How to implement oAuth - Login with Google - in your Bubble app

Hello Fellow Bubblers,
In this issue, we’re going to cover how to implement oAuth with Google. By the end of the article, you should have a workflow that enables your user to log in to your app with their Google account.
Getting Started
To get started, you’ll need to go to https://console.developers.google.com/ (you can set up an account or sign in using your gmail account). After agreeing to the Terms of Service, you’ll land on the Google Cloud Platform.
In the top-right of the screen, click on ‘create a project’. This will be the Bubble project in which you want to enable Google sign-in. You should have different projects for each of your Bubble builds. You can name your project after your Bubble app.
Next, navigate to the ‘credentials’ tab in the left sidebar. At the top of the page, click ‘+ Create Credentials’ then ‘oAuth Client ID’.
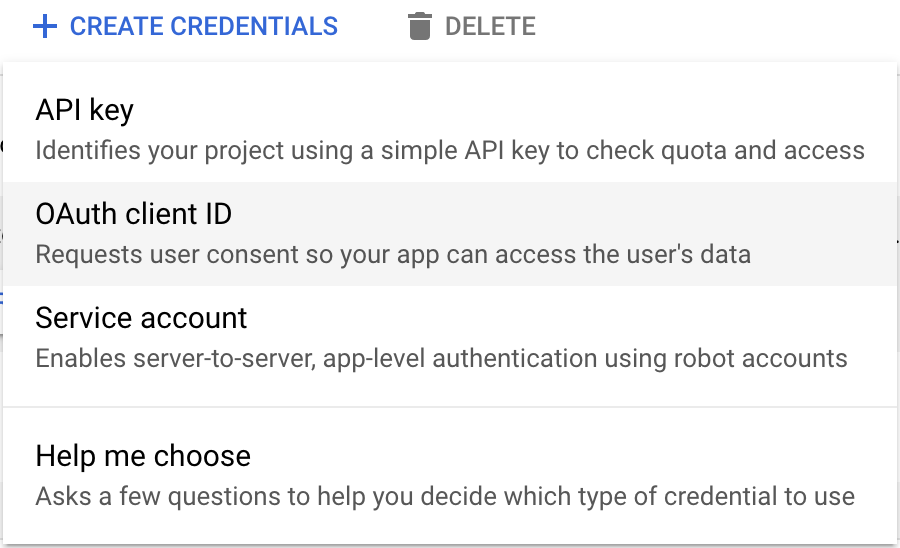
Next, select ‘Configure Consent Screen’. On the following page, select ‘External’ under User Type (if the app you are creating is a private app e.g. an internal tool for an organization, you would select ‘Internal’).
On the next page, you’ll need to fill out the form according to the details of your app, including your app name, logo, and email address (for support). This information will appear on the signup page when a user opts to sign in to your app with Google.
Under ‘Authorized Domains’ make sure to input the top domain for your app, e.g. example.com.
You’ll then skip the next two pages (Scopes page and Test users page) by selecting ‘save and continue’ at the bottom of the page. On the Summary page, click on ‘Back to Dashboard’ at the bottom of the page.
Once back in the dashboard, select ‘credentials’ on the left sidebar. You’ll again click on ‘+Create Credentials’ at the top, then oAuth Client ID. This time, under the ‘Application type’ dropdown, select ‘Web application’, then give it a name.
Under the section ‘Authorize Redirect URIs’ click on ‘Add URI’. In the input, you’ll need to add your domain address, and append this text:
api/1.1/oauth_redirect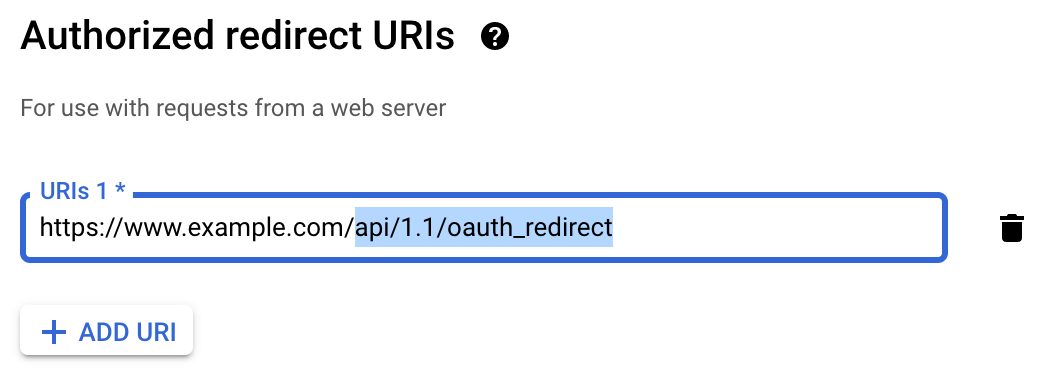
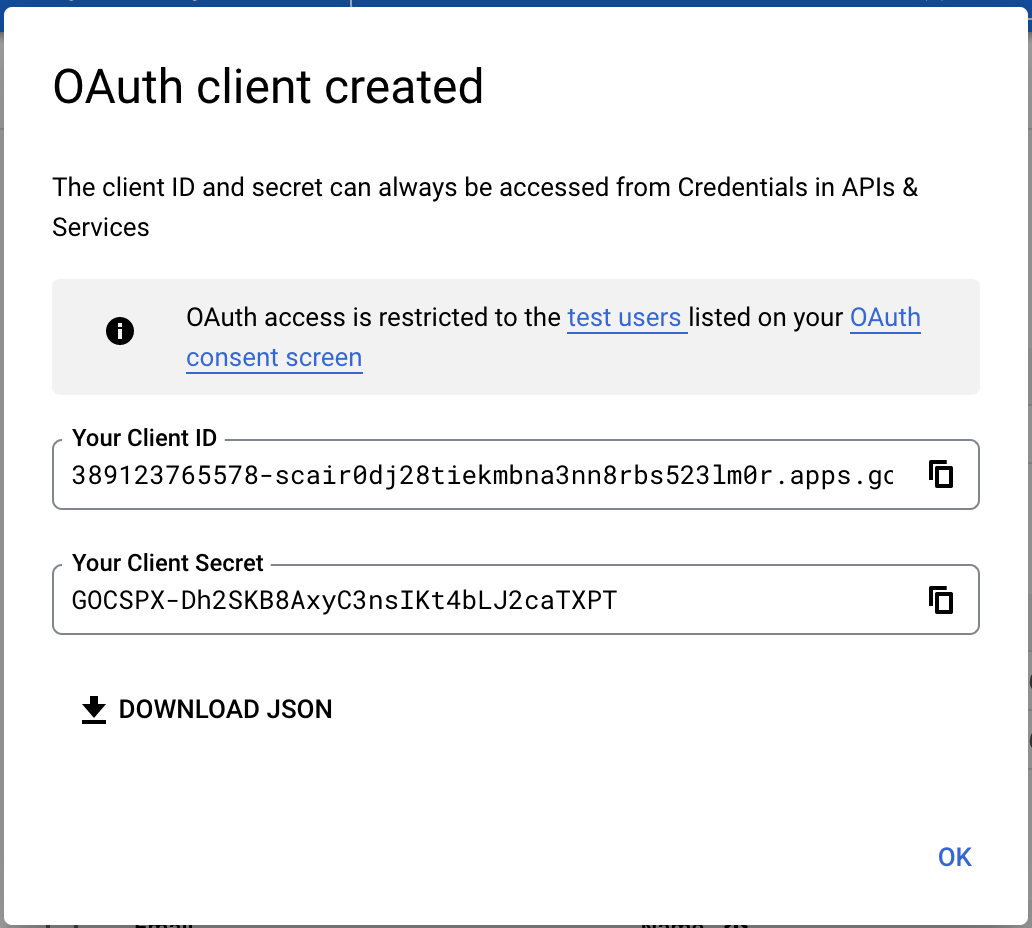
Once you create your oAuth client, you’ll see a popup on the new page with your Client ID and your Client Secret Keys. You’ll need to copy each of these so you can add them to your bubble project. See example below:
Bubble Setup
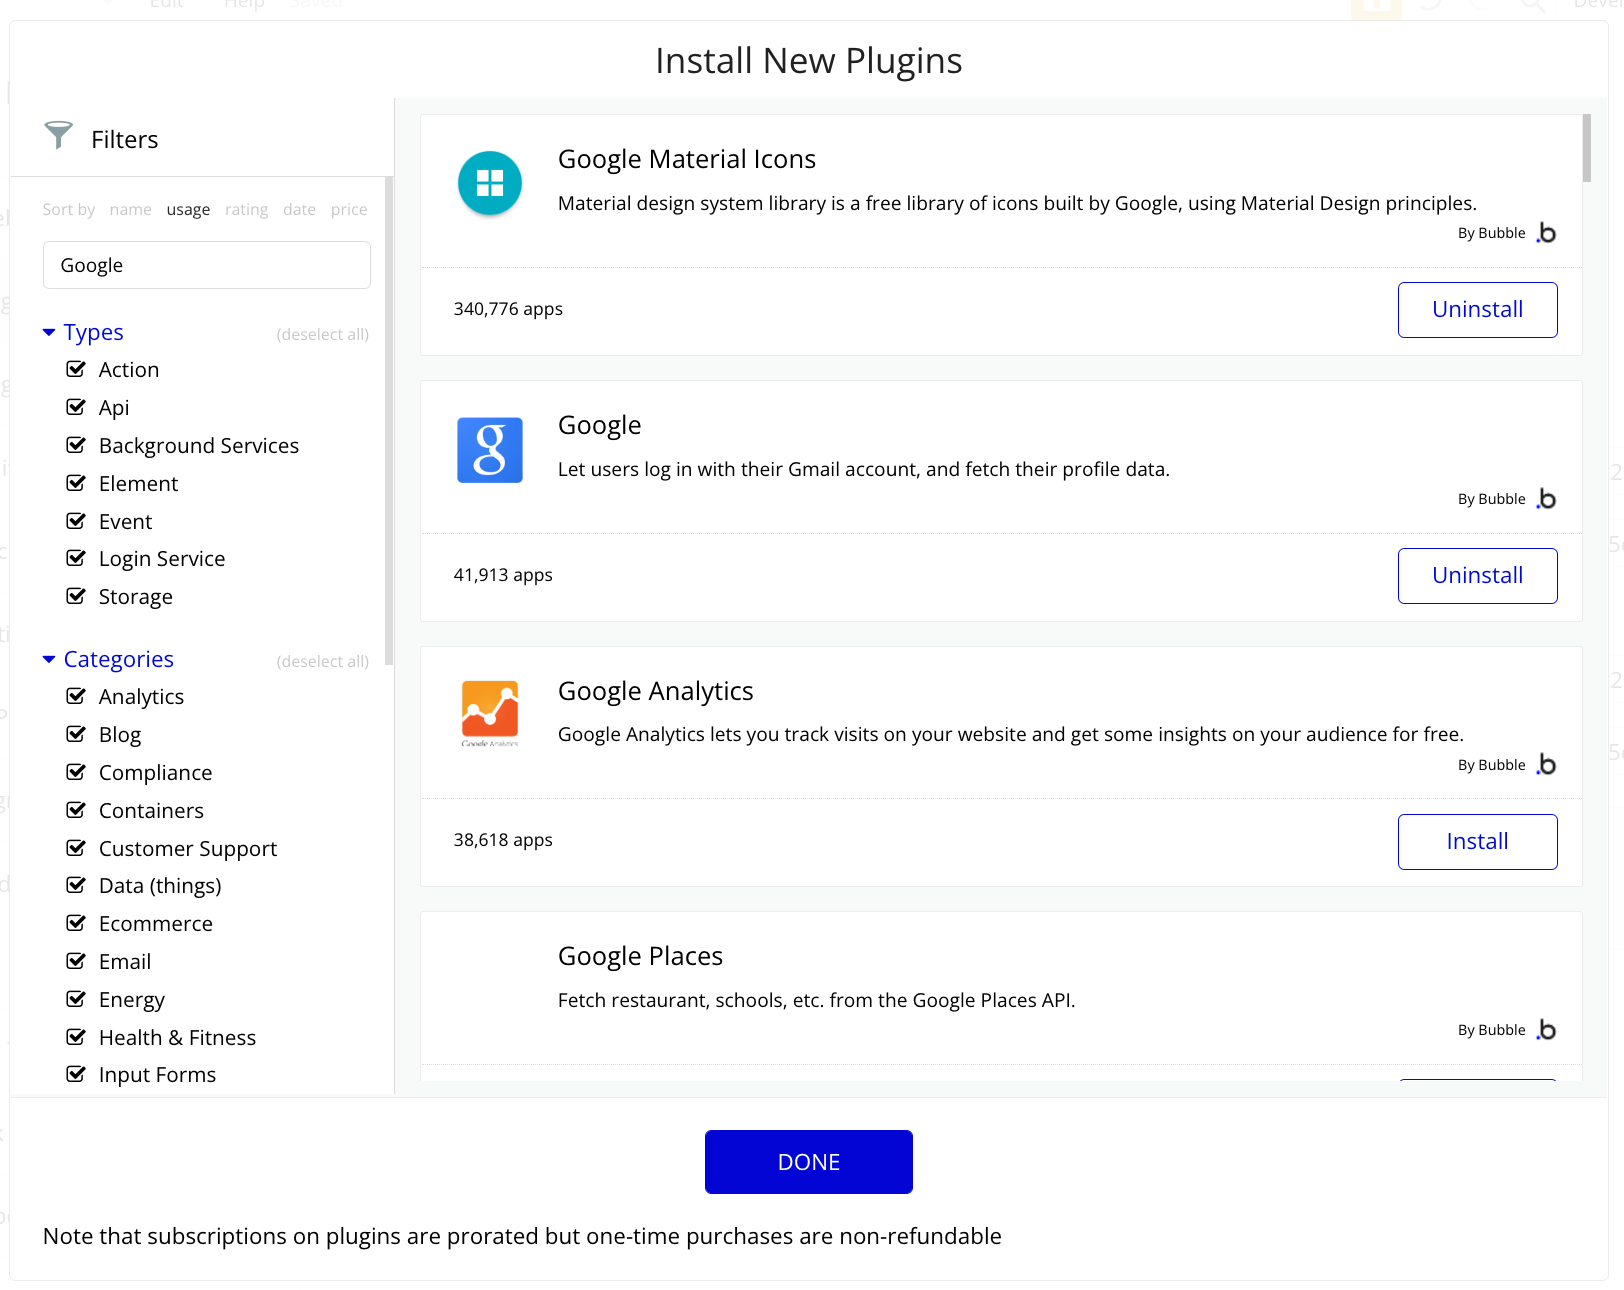
Once you have your keys, return to your bubble app and navigate to the plugin tab. Here', you’ll need to search for the Google app created by Bubble, and install it.
Once installed, you’ll need to input the keys you got from Google into the app:
App secret = Google Client Secret
App ID/API Key = Google Client ID

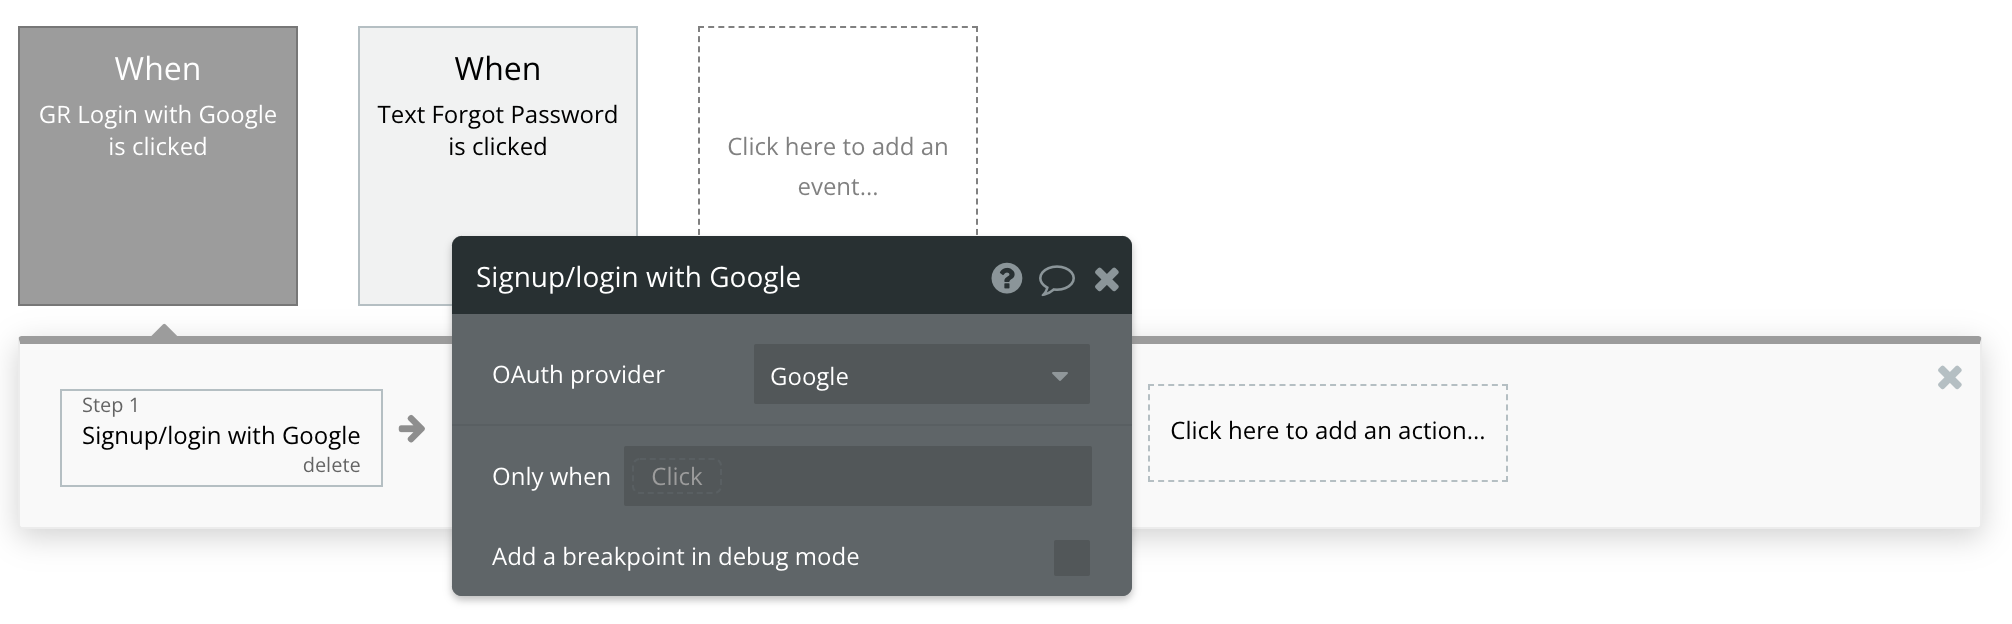
We can now implement the workflow to enable a user to login with Google.
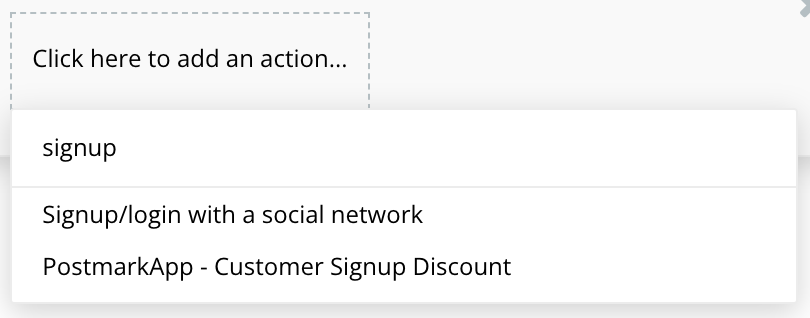
In the Design tab, select the button or group you would like to use for Google login, and start a workflow. In the workflow, create a new action, and search for ‘signup’. You’ll notice that an option to sign up with social network appears. Select this option, and in the oAuth dropdown, select ‘Google’.
You can then add another action to take your user to the page you’d like them to go to next.
That’s it! You’ve now implemented oAuth with Google, and users of your app can now sign in with their Google accounts 🎉.
If you found this article helpful, share it on Twitter (and tag me @shikuwangombe if you do!) or your social platform of choice. And make sure you’re subscribed to my newsletter :).
If you’re new to Bubble and are interested in going from 0 to 1 with me and a cohort of students, sign up to my Bubble Bootcamp!
Happy Bubbling!
Loved this issue 🚀