How to create "Share" links for Twitter, Whatsapp, and Email in Bubble
Want a user to share a page from your Bubble app? This tutorial covers how to create share links.

Hello Fellow Bubblers,
In this issue, we’re going to cover how to create share links in Bubble. You’ve probably seen such links when you’re browsing a blog/news site, or perhaps a directory. These are links that allow a user to share a page on Twitter, Facebook, Linkedin, Email etc.
Here’s an example of a share button. At the bottom of any article in Substack (e.g. my previous article on Google oAuth implementation), you’ll see a button labeled “Share”. When clicked, this button opens up a popup that displays the different platforms where you can share the substack article:


This is what we’ll be building in Bubble. Specifically, we’re going to cover how to create share links for Twitter, Whatsapp, and Email. This article is an extended version of a Twitter thread I wrote a couple of months back on how to create “intent to tweet” links for Twitter. Feel free to check that out as well. Follow me there for more short-form thread tutorials, and check out my Threads By Me page to see all my Twitter thread tutorials.
Getting Started
To get started we’re going to create an Option Set in the Bubble Data tab. Bubble defines an option set as follows:
Option Sets allow you to have a static list of choices, "Options", which are global to your app. This is great for situations where you know ahead of time what options are possible for a variable - things like days of the week, marital status, team name for a given user, etc.
So an option set is a static list of data that a user can choose from, but a user cannot change. You as the developer/admin can make changes to an option set, such as adding or removing an option, but a user cannot make changes to the options available.
Select the Data Tab in the left sidebar, then select ‘Option Sets’

You’ll notice an input labeled ‘New Option set’. Here, we’ll add the text Share Options then click ‘Create’. Share Options will represent the list of platforms on which a user can share the page link - Twitter, Whatsapp, Email, etc.
Next we’ll take a look at attributes. Attributes allow you to add more values that are linked to an option. By default, an option set comes with a ‘Display’ attribute built-in. This allows you to label an option.
In our options, we’re going to create two additional attributes:
Image - This will display the platform logo for an option
Link - This will be the unique text link for sharing on a particular platform
To add an attribute, click on ‘Create an Attribute’.
For the image attribute, input the following:
Attribute name: Platform Logo
Attribute type: Image
Then click create.
For the link attribute, input the following:
Attribute name: Link
Attribute type: Text
Then click create.

With the attributes done, we can now start to create our options. First, we’ll create an option for Twitter.
‘In the New Option’ input, type in Twitter, then click create. Once the option is created, click on modify attributes.
For the Platform Logo, upload a picture of the Twitter logo (You can find this on Google or on Twitter’s Brand Toolkit page).
For the Link, input this text: https://twitter.com/intent/tweet?url=
Twitter calls this text a Web Intent URL. This URL is what will open up Twitter when a user clicks on the Twitter share link.

We’ll follow the same process for Whatsapp. However, for the ‘Link’, input this text:
whatsapp://send?text=
This link is what will trigger Whatsapp to open.
Finally, for the email option, add a mail logo/icon of your choice, and under Link, add this text:
mailto:
We’ve now created three options for our share links.
Building the Frontend
With our Option set done, we can now create the options in the Design tab. First, add a repeating group to your page, and set the type of content to Share Options - this is the option set we created.
Next, set the data source to All Share Options
Our repeating group is now linked to all the options we created!
For our layout, set the repeating group to 1 row and 3 columns. This will give us 3 cells - 1 for each option.
Next, we’ll add a group inside the Repeating Group and set the layout of this group to column.
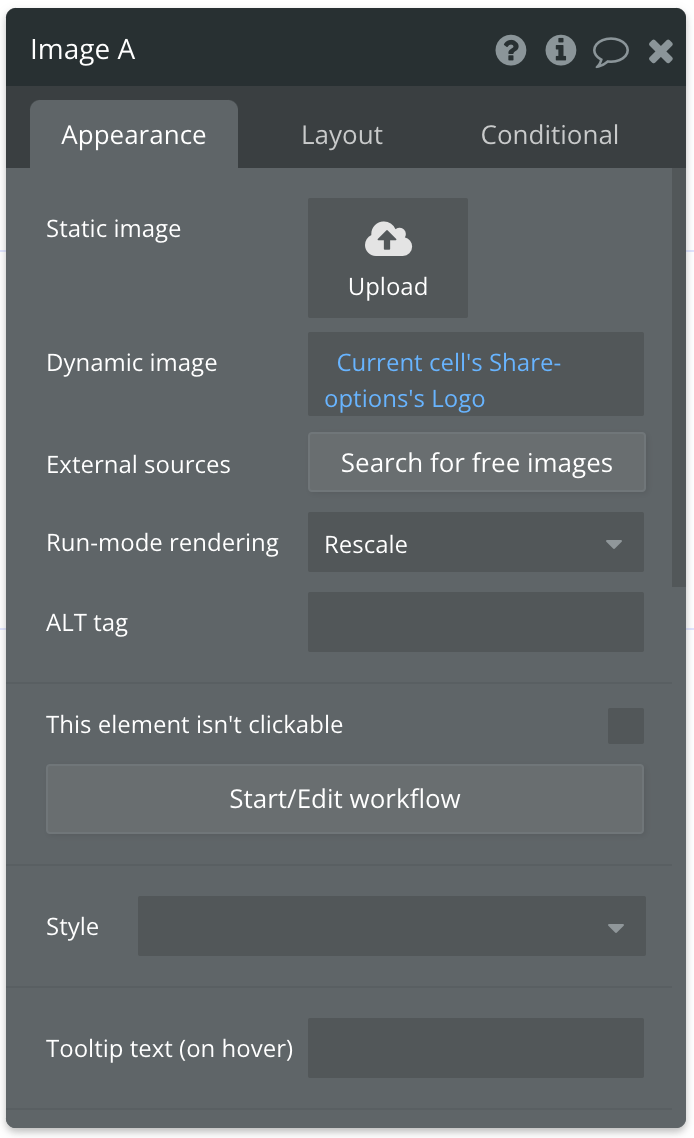
Inside the group, add an image element and center it. With the image selected, in the Property Editor, add this dynamic data:
Current Cell’s Share Options Logo.
This will reference the logo image for each of the options we created.
If you preview your page at this point, you should see the repeating group displayed with the logos for each option.

Back in the editor, we’ll now add a text element beneath the image element in the repeating group. For the dynamic data of this element, we’ll input the following:
Current Cell’s Share Options Display
This will pull in the display text from each option and show it beneath the image.

This is all we need for the front-end. You can also remove the seperato if you want a cleaner look (a seperato is the divider between cells in a repeating group, i.e. the gray line in between each cell in the image above.)
Workflows
The final step is to add functionality using workflows.
Twitter Workflow
Select the group that contains the image and text element, and click ‘Start/Edit Workflow’. Under actions, set the first action to be ‘open an external website’. In the editor, under destination, we’ll add the following dynamic data:
Current Cell’s Share Option’s Link
This references the links we put in our list of options.

If you preview the page at this point and click on any of the options, your links should work now. When clicked, each one should send you to the appropriate platform - Twitter, Whatsapp, or your email app!
But we still need to define what we want to be shared.
To define the content that you want a user to share (in this case, we want the user to share a link to the current page of the app), we need to use conditionals. You can create conditionals at the Workflow level by creating separate workflows to trigger based on whether a conditional statement is true; or you can do so by creating multiple actions in a single workflow, and setting the conditionals on each action, so the action will only trigger if the conditional statement is true. In this example, I’ve used the latter method, and created a workflow with multiple actions - each with a conditional.

I covered how to customize a workflow for sharing content on Twitter in this thread, so I’ll cover how to do the same with email and with Whatsapp below.
Whatsapp Customization
This one is quite straightforward. To set the text that is shared, add “This URL” after the link portion of dynamic data. Then set a condition to the action that it should only trigger when the option that is clicked is “Whatsapp”.

You can read more about sending Whatsapp messages here: https://faq.whatsapp.com/iphone/how-to-link-to-whatsapp-from-a-different-app/?lang=en
Email Customization
There are multiple ways you can customize email links. You can set the subject line of your email, the initial text in the body of your email, the recipient, the CC, and the BCC, all in your Bubble workflow. To customize each of these, you’ll need to add the following dynamic text using the arbitrary text function:
For user email: Current User Email
For Subject: ?&Subject=Your subject
For CC: &CC=Your recipients
For BCC: &BCC=Your recipients
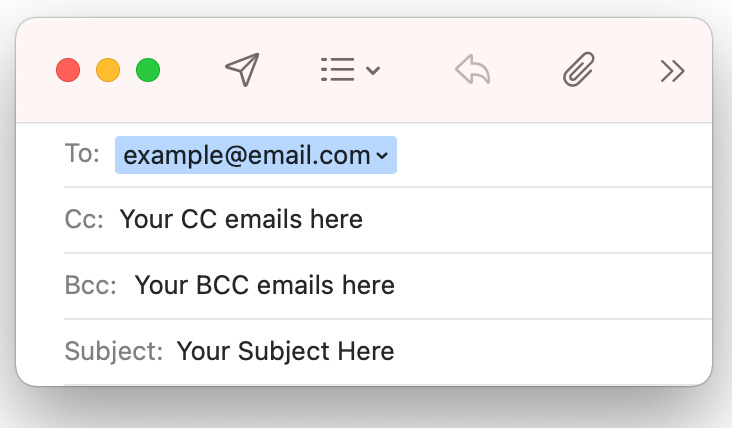
It should look something like this:


The condition used here ensures that this action is only triggered for the email option.
Note: If you have your users’ emails saved in your database, you can reference that using dynamic data in place of ‘example@email.com’. Make sure to add a ? after the emails, and a & before each subsequent variable!
If you test the email link now, you should see your mail app open with the details you put in your arbitrary text fields populated in the relevant email fields.
And that’s it! You’ve now successfully figured out how to create share links in your Bubble app!
If you found this article helpful, it would mean a lot to me if you shared it! Forward this email to someone you think would find this useful, or share the article on Twitter (and tag me @shikuwangombe if you do!) or your social platform of choice. And make sure you’re subscribed :).
Happy Bubbling!
Hi Shiku, thank you for this tutorial. Like you did for the email, could you share how to include dynamic text in sharing to WhatsApp?
Hi Shiku, this is great thank you! I've just subscribed :-)
If I wanted to share from bubble to a whatsapp contact (not a number the user types in), what would you recommend?
Many thanks in advance